
Have you ever wondered why some parts of the house remain cold, despite the heat being on? Or maybe you want to know the reasons behind your winter heating bills being so high? One of the main reasons behind all these issues is thermal bridging and it mostly happens in older houses. Knowing about thermal bridging is important for making your house pleasant and less power-consuming. In this blog, we will help you understand more about thermal bridges and its effects on your home.
What Is a Thermal Bridge?
The job of your home’s insulation is to keep the heat inside during the winter. A thermal bridge is like a hole or a gap in that blanket. It is an easy path for heat to travel from inside your warm house to the cold outdoors. The situation arises when conductors, like wood or metal, penetrate the insulation. These materials have excellent heat conduction properties, and thus the heating system has to exert more effort, which is reflected in the rising energy expenses.
What Are the Sources of Heat Loss?
Thermal bridges always serve as lonely exits for heat to move on to the other side of the house. Thermal bridges usually occur in the walls where the wooden and metal studs are located. Even though the insulation between the studs is efficient, the heat still escapes through the studs. Heat is lost not only in the points where walls connect with the floor or ceiling, but also around windows and doors, and so forth. If the openings created for pipes or vents are not properly sealed, they can leak heat as they interconnect from the interior and the exterior.
The Effect of Thermal Bridging
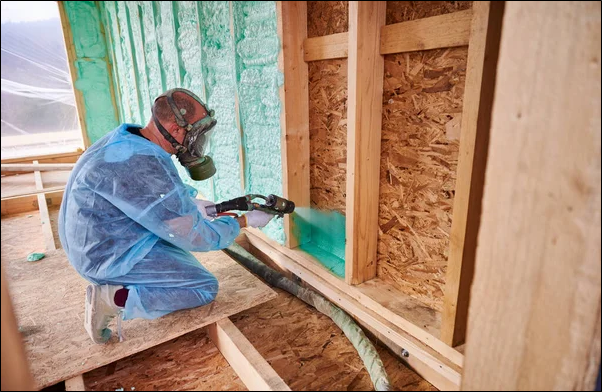
The extent of the effect thermal bridging is very much underestimated. Professional home insulation contractors should find problematic areas and recommend the most effective solution. The most effective method to stop thermal bridging is to form a continuous layer of insulation. The use of modern insulation materials and techniques can do wonders . The application of spray foam insulation is one of the most effective approaches. When applied, the spray foam expands to fill all the cracks and gaps, thereby creating a barrier through which air cannot move thus preventing heat from being lost.
There are several types of spray foam, and each has its advantages and disadvantages to consider. Closed cell spray foam insulation is a very heavy and tough material. It can bear a very high R-value and at the same time it serves as a barrier against moisture, thus it can be applied in basements or crawlspaces. Open cell spray foam insulation is a lighter, more flexible foam that is very good at sound control and is usually applied on walls and attics. A technician can guide you to which one is the best for your house.
Cellulose attic insulation is another great option for stopping thermal bridges, especially in attics. This product is composed of recycled paper. It is loose cellulose insulation that is blown into place around the pipes, wires, and joists, filling all the voids and creating a continuous thermal barrier. Moreover, it is an eco-friendly material that’s highly effective in maintaining warm air within the attic and, consequently, throughout the entire house. By incorporating a cellulose attic insulation product, you can effectively minimize heat loss through your roof.
Conclusion
One of the best investments at home is improving your home’s insulation to reduce thermal bridging. The right insulation will increase the comfort in your house as well as bring you huge savings on your energy bills. The choice between closed cell spray foam insulation with its moisture-blocking characteristics and open cell spray foam insulation with its sound-dampening quality boils down to one thing: continuous barrier creation. If you need a professional home insulation contractor to guide you in this matter, get in touch with The Green Cocoon. We provide professional spray foam insulation services along with other eco-friendly options like cellulose attic insulation to maximize your energy efficiency.