Skip to content
  • 978-462-0082

  • info@thegreencocoon.com

  • Monday – Friday 8:00 a.m.– 4:00 p.m.

logo
Menu
  • About Us
    • Team
    • Affiliations
    • Giving Back
  • Products
    • Open Cell Spray Foam Insulation
    • Closed Cell Spray Foam
    • Cellulose Insulation
    • Mineral Wool
    • Fiberglass
  • Portfolio
  • Testimonials
  • Blog
  • Contact
  • Careers
  • About Us
    • Team
    • Affiliations
    • Giving Back
  • Products
    • Open Cell Spray Foam Insulation
    • Closed Cell Spray Foam
    • Cellulose Insulation
    • Mineral Wool
    • Fiberglass
  • Portfolio
  • Testimonials
  • Blog
  • Contact
  • Careers

Category: Home Maintenance Tips

Loading...

Why It’s Important to Check Your Attic for Moisture in the Winter

Home Maintenance Tips

People often neglect their attics, leaving them unexplored for years. However, checking your attic during the winter is of paramount importance. This is the time when condensation becomes a significant concern. Attic moisture can lead to various problems, and it's crucial to understand the causes and consequences of this issue. In this blog, we will explore the reasons why it's important to inspect your attic for moisture in the winter, the potential causes of condensation, and why it's not always a roofing problem.

The Impact of Condensation

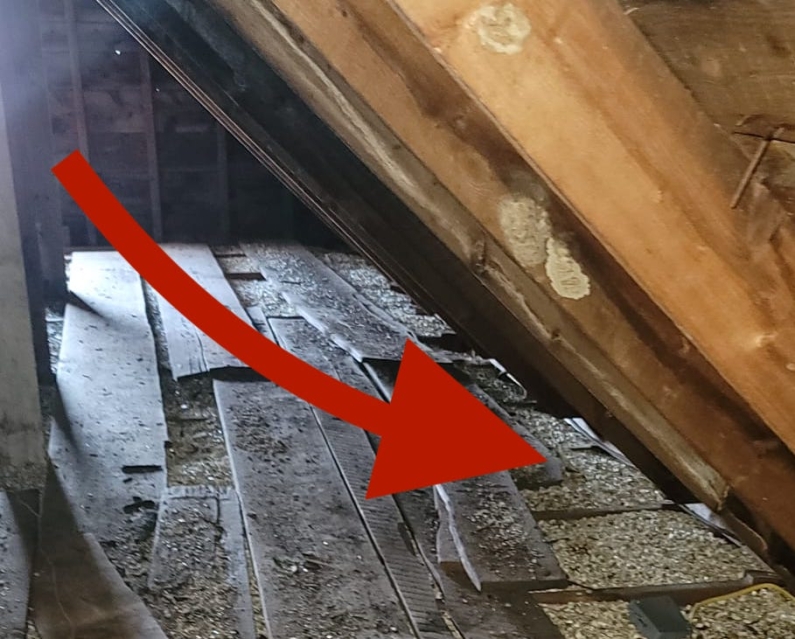
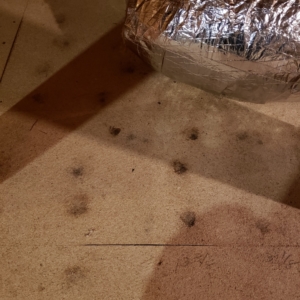
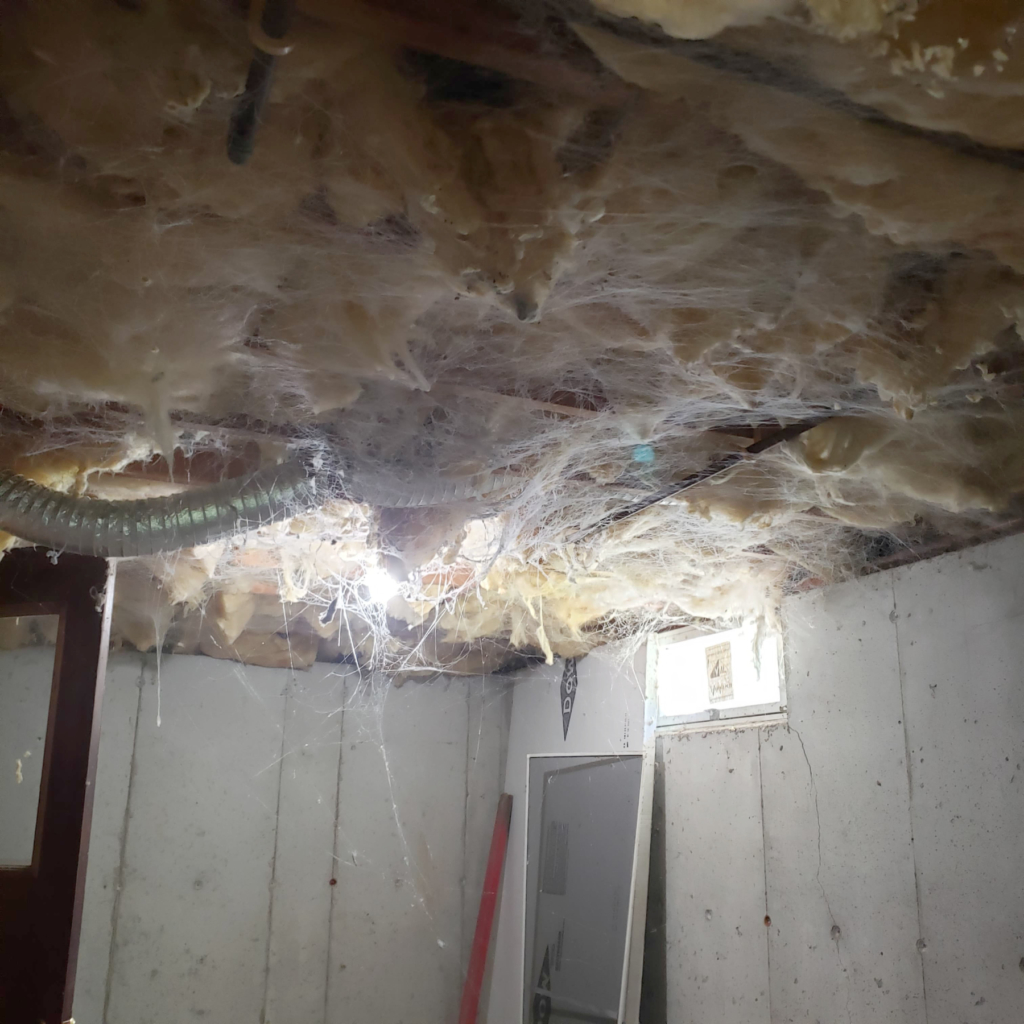
Condensation is a major adversary for your home, and it can cause a range of issues. It can occur when warm, moisture-laden air from the interior of your home rises into the attic and meets a cold surface, typically the roof deck. This clash of temperatures causes the moisture in the air to condense into water droplets. Over time, this can lead to various problems, including:

  1. Mold and Mildew Growth: Excess moisture in the attic provides an ideal environment for mold and mildew to thrive. This can lead to health problems for your family and structural damage to your home.
  2. Insulation Problems: Condensation can saturate insulation materials, reducing their effectiveness. Inadequate insulation can result in energy loss and higher utility bills.
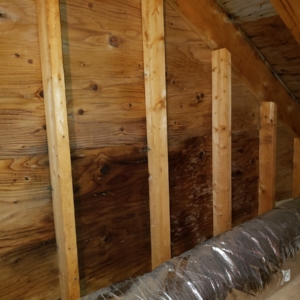
  3. Structural Damage: Prolonged exposure to moisture can compromise the integrity of your attic's structure, including wooden beams and rafters, potentially leading to expensive repairs.
  4. Reduced Energy Efficiency: A damp attic can affect your home's energy efficiency. Your heating system will have to work harder to maintain a comfortable temperature, leading to higher energy bills.

Common Causes of Attic Moisture in Winter

Several factors contribute to attic moisture during the winter, making it essential to regularly check your attic for issues. Here are some common culprits:

  1. Inadequate Air Barriers: Older homes often lack proper air barriers between the living space and the attic. This allows warm, moist air to infiltrate the attic, leading to condensation when it meets the cold roof deck.
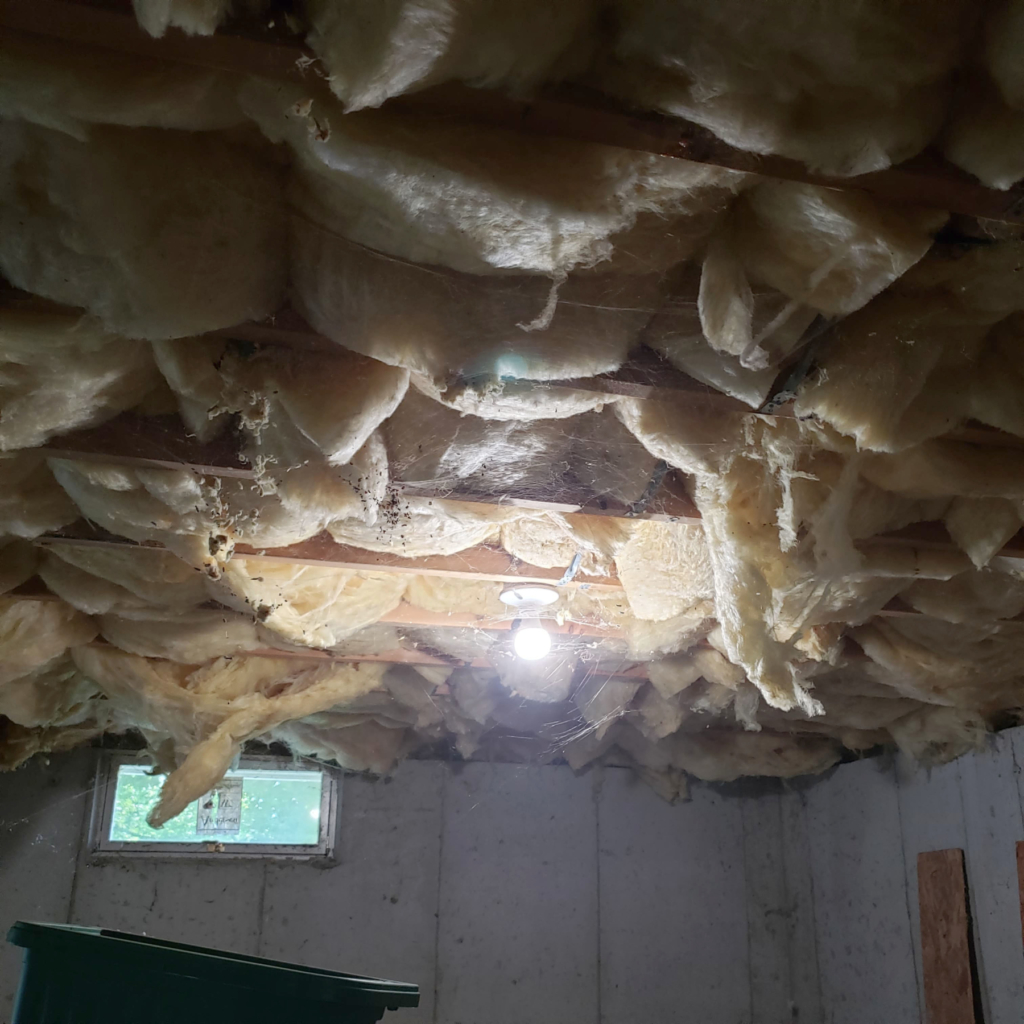
  2. Can Lights: Recessed can lights can create openings in the ceiling that allow warm air to escape into the attic. These fixtures are a common source of heat and moisture transfer.
  3. Unsealed Attic Hatch: An unsealed attic hatch provides an easy path for warm indoor air to flow into the attic. When this air cools, it can lead to moisture problems.
  4. Poor Ventilation: Proper attic ventilation is crucial for removing excess moisture before it can condense. Inadequate or blocked ventilation can exacerbate moisture issues.

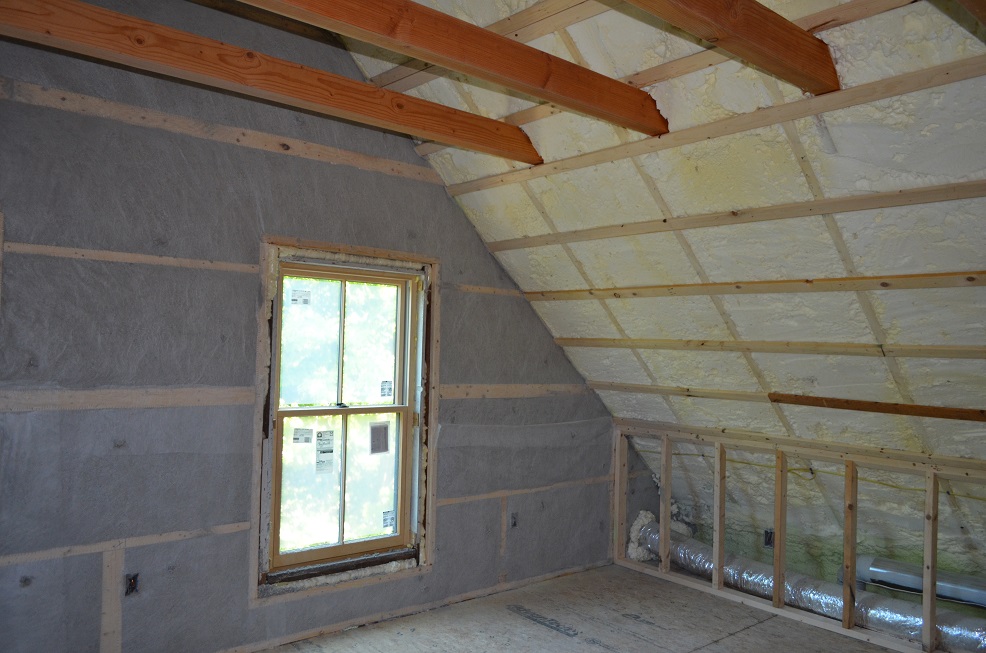
Proper Attic Ventilation

Proper ventilation plays a vital role in maintaining a healthy attic environment. When designed correctly, it allows air to circulate, reducing humidity and preventing condensation. Here's why proper attic ventilation is essential:

  1. Preventing Moisture Buildup: Adequate ventilation helps remove excess moisture from the attic, preventing condensation and related problems.
  2. Extending Roof Lifespan: Well-ventilated attics can help extend the lifespan of your roofing materials by preventing moisture-related damage, such as rot and mold growth.
  3. Improving Energy Efficiency: A properly ventilated attic can enhance your home's energy efficiency by reducing temperature extremes in the attic space, making it easier to maintain a comfortable indoor temperature.
  4. Enhancing Indoor Air Quality: Good attic ventilation can prevent the infiltration of mold and mildew spores into your living space, which can improve indoor air quality and protect your family's health.

Misconceptions About Roof Leaks

Many homeowners who discover moisture in their attic automatically assume they need roof repairs. However, in most cases, it's not a roofing problem but rather an issue related to ventilation or moisture. Here are some misconceptions about roof leaks:

  1. Visible Moisture Equals a Roof Leak: Seeing moisture in your attic doesn't necessarily mean there's a roof leak. In many cases, the moisture results from other factors, such as poor ventilation or excess indoor humidity.
  2. Roof Damage Is the Culprit: Assuming that roof damage is the root cause can lead to unnecessary expenses. Before scheduling costly roof repairs, it's essential to investigate the underlying issue, which may be related to ventilation or insulation.
  3. Year-Round Problem: Attic moisture is more common during the winter due to the temperature difference between the warm indoor air and the cold attic space. It may not be an issue during the summer months.

Read also: Does Spray Foam Damage Roof Shingles?

Conclusion

Checking your attic for moisture during the winter is a critical home maintenance task. Understanding the causes and consequences of attic condensation is essential for maintaining a healthy home. Inadequate ventilation, improper air barriers, and various household factors can contribute to attic moisture, leading to problems such as mold growth, insulation issues, structural damage, and reduced energy efficiency.

Vermiculite in attic

The Hidden Dangers of Vermiculite

Home Maintenance Tips

Vermiculite in atticFor those of you that know any of us here at The Green Cocoon, you know we’re passionate about what we do and how we do it.  We also aim to spread knowledge and promote safety in our beloved homes.

Today, we’re addressing a silent threat lurking within the walls (and attics and basements) of many older houses: vermiculite. While it may sound innocent, this seemingly harmless material can pose significant health risks if mishandled. In this article, we’ll shed light on the dangers of vermiculite, discuss how covering it with insulation can exacerbate the problem, and emphasize the crucial importance of seeking professional assistance in dealing with this potential hazard. 

Understanding Vermiculite:

Vermiculite, a naturally occurring mineral used in insulation and gardening, might be present in your home if it was built before the 1990s. While it served as an effective insulator due to its lightweight and fire-resistant properties, it was later discovered that some vermiculite deposits contained asbestos fibers—a known carcinogen.

The Hidden Danger:

Asbestos is a microscopic fiber that, when inhaled, can lead to severe health conditions, including lung cancer, mesothelioma, and asbestosis. The real danger lies in the fact that vermiculite contaminated with asbestos may not be immediately identifiable. It can resemble harmless attic insulation or be concealed within walls, putting you and your loved ones at risk without your knowledge.

Covering Vermiculite – A Common Misstep:

Now, let’s discuss an often-misunderstood solution that can worsen the situation—covering vermiculite with additional insulation. While the intention may be to reduce exposure, it can have unintended consequences. Encapsulating the contaminated material can disturb it, causing asbestos fibers to become airborne and spread throughout your home, leading to a more extensive contamination issue. This inadvertent disturbance can increase the risk of exposure and exacerbate the health hazards associated with vermiculite.

The Need for Professional Assistance:

When it comes to dealing with vermiculite, our strongest advice is to leave it to the professionals. Trained asbestos abatement experts have the necessary expertise and equipment to handle the situation safely. Attempting to remove or disturb vermiculite yourself can lead to inadvertent asbestos fiber release and put your health at risk. A professional will conduct a thorough assessment, develop a safe remediation plan, and ensure that all necessary precautions are taken to minimize exposure risks for you and your family.

Your safety and well-being are of utmost importance to us. Vermiculite contaminated with asbestos can pose significant health risks, and it is crucial to approach the issue with caution. Rather than attempting to handle the situation on your own, we strongly recommend seeking professional assistance. By doing so, you can trust that experts will safely manage the removal or encapsulation process, reducing the risks of asbestos fiber release and safeguarding your home and loved ones.

Remember, knowledge is power. Share this information with others to raise awareness about the dangers of vermiculite and promote the importance of professional involvement. Together, we can create safer and healthier living environments for everyone.

Stay safe, stay informed, and never hesitate to seek professional help when it comes to protecting what matters most—your home and your loved ones.

The Green Cocoon - Attic Ventilation problem showing mold

Why Proper Attic Insulation Is Crucial

Home Maintenance Tips

Your attic does much more for your home than store your stuff. It is designed to provide a protective barrier for your home from cold, heat, and humidity. But in order for your attic to do its job, it must be properly insulated.

Traditional Insulation Not Effective

The Green Cocoon has almost two decades installing insulation and has discovered that traditional insulation isn’t effective in most cases! The most common types of insulation used in one’s attic are fiberglass and blown cellulose. The problem with those types of insulation is that many inexperienced contractors install them without sealing to prevent airflow. With fiberglass or cellulose, air can move quickly through the insulation and with that air comes moisture.

green-cocoon-nh-attic-insulation
Improper attic venting causes mold and moisture issues. Baffle vents were present but soffits were blocked.

Escaping Heat Causes Problems

If heat is escaping into the attic from below, and the attic is not properly vented, the warm air will heat the roof causing ice dams to form. Some contractors try to fix ice dams by increasing the ventilation in the attic. But what they should be doing is putting in proper insulation! It’s all about the R-value.

In New England, the R-value requirements for an existing attic is R-38, but for new construction it requires a value of R-49! That’s because newer construction techniques are becoming more efficient.

Did you know that R-value is measured in an air-tight vacuum chamber and allows researchers to conduct physical experiments without any interference from the environment? Your wall is not a vacuum chamber and the materials do not perform the same in the real world, unless completely air-sealed like the chamber. R-value is not constant, so it’s important to use the right type and amount of insulation.

Closed Cell Spray Foam Recommended

Closed cell spray foam is the only insulation material approved for spraying directly against the roof deck because moisture can’t pass through it. This, along with the fact that the foam fills the holes and crevices, makes it the best insulation choice to prevent condensation in the attic.

The Green Cocoon Attic Insulation NH
Nails are rusty and sheathing is rotted. Closed cell spray foam to the rescue!

Proper Ventilation

If you have properly insulated and air-sealed your attic, you won’t have heat loss or moisture build-up. We suggest installing a soffit and ridge vent, or two gable vents to help with air circulation, if you have an uninsulated roof.

If your attic is insulated with fiberglass or cellulose, and you have insulation covering the roof slopes, you need to have a vent behind it. As mentioned above, moisture can potentially pass through the insulation and condense on the roof causing a host of issues.

Reasons Not to Ventilate

If you have HVAC and/or ductwork in the attic, you don’t want to vent the attic because you will lose a lot of efficiency. The heating system will try to warm the house from a 10-degree attic and cool it from 130! A conditioned attic will prolong the life of your equipment as well as save you money with your heating and cooling bills.

green-cocoon-nh-attic-insulation
Notice water marks on the floor from the water that has built up and dripped off the cold nails from condensation.

Start Right and Properly Ventilate

If you have fiberglass or cellulose insulation already installed, then it is crucial that you have adequate and proper ventilation. But, upgrading your insulation saves money and efficiency in the long run. Don’t use ventilation as a way to solve inefficiencies with subpar insulation. That’s like putting a band aid on a bullet wound!

If you want more information on how we can help you, contact us.

green-cocoon-ice-dams-prevent

Ice Dams and How to Prevent Them

Home Maintenance Tips

Does your house have icicles hanging from the roof during the winter? If so, there is something going on that could potentially cost you thousands of dollars. It is called an ice dam and here’s how to prevent them.

What is an ice dam?

ice dams and how to prevent them using closed cell spray foam

If the attic isn’t properly insulated, during the winter the warm air will escape and melt the first layer of snow on your roof. Many uneducated contractors will tell you to increase your attic insulation to prevent ice dams. While this may slow down the buildup of ice dams, it will essentially increase the speed of your heat loss. Consequently, the heat loss will make your home less efficient.

DIYers (do-it-yourself) like to solve the problem by putting heat tape on the roof, but that can be incredibly damaging to the shingles. Furthermore, the tape does not solve the problem, which is inefficient insulation and heat loss.

The layer of snow that is against the roof will melt and run down the roof shingles. You can’t see this happening because it is under the pile of snow. Once the water reaches the overhang where it is colder, an ice dam starts to form. This process happens over and over; the ice dam gets bigger; and the water gets higher. Eventually, water will get under the shingles!

As the melting continues, the ice dam and water lift the shingle more and more. Eventually, it hits the top of the shingle. That is when water can get into your house, and potentially cause thousands of dollars in damage.

How to prevent ice dams

Whether you are creating a conditioned or unconditioned attic, we recommend the same things.

  1. Seal the gaps – First you need to air seal any gaps or holes in the floor or roof. There are several products that we suggest you use. Please contact us so we can help you decide which product is best for you.
  2. Use correct R-value – Make sure you have enough R-value. Remember, fiberglass doesn’t have a constant R-value so we don’t recommend it. In southern New Hampshire, you need a minimum of an R-49.
  3. Ventilate the attic – If you plan to insulate the attic floor, make sure to allow for proper ventilation to prevent condensation. If you are not sure you have adequate insulation, give us a call and we will come out and take a look.

Green Cocoon, spray foam insulation NH
Using a spray foam in the attic is the best choice because it fills the holes and crevices. We recommend closed cell spray foam for several reasons:

  1. It has a higher R-value per inch than open cell spray foam.
  2. Closed cell spray foam is a vapor barrier and water can’t permeate it.
  3. It sticks to the walls and fills all the crevices and holes.


Learn more about Closed Cell Spray Foam by watching a video on our website. Contact us with questions.

Winter Outlook - The Green Cocoon Insulation NH, MA, ME

Prepare for a “Shake, Shiver and Shovel” Winter with Eco-Friendly Insulation

Home Maintenance Tips

According to Farmers’ Almanac (Almanac), we are in for a “Shake, Shiver and Shovel” winter. According to their extended forecasts, this winter season will have plenty of snow, rain, and mush—as well as some record-breaking cold temperatures! With the temperature cooling, it is the perfect time to save money and prepare for the shake, shiver and shovel winter with eco-friendly insulation. Make your home more energy-efficient by replacing your old insulation one of The Green Cocoon’s eco-friendly insulations.

The first day of winter and the shortest day of the year, officially arrives on December 21, 2022, but that doesn’t always mean that the cold temperatures and snow storms will wait until then. So what’s in store for New England? Read on.

According to the Almanac, “The first bite of winter should come earlier than last year’s. December 2022 looks stormy and cold nationwide with an active storm pattern developing and hanging around for most of the season over the eastern half of the country.” We think there will be a white Christmas this year!

New Hampshire Known for Crazy Weather

Winter is coming - Insulation needed from The Green Cocoon
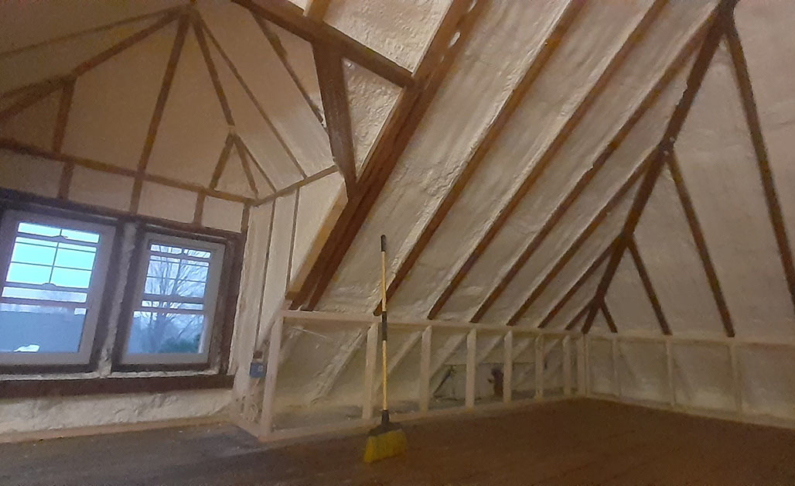
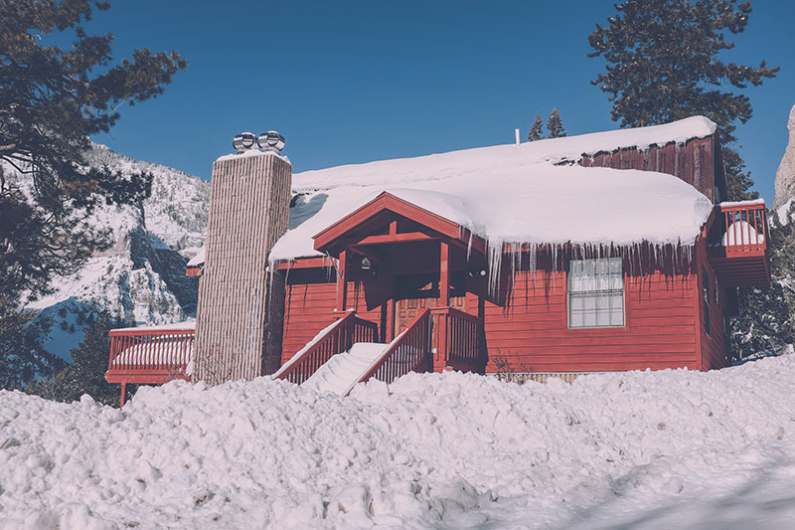
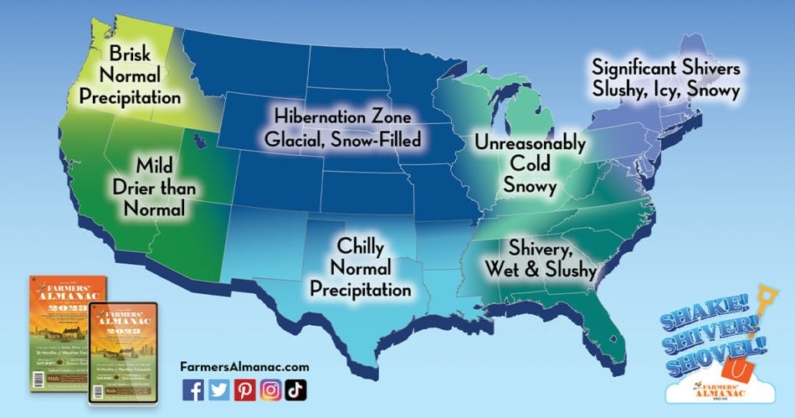
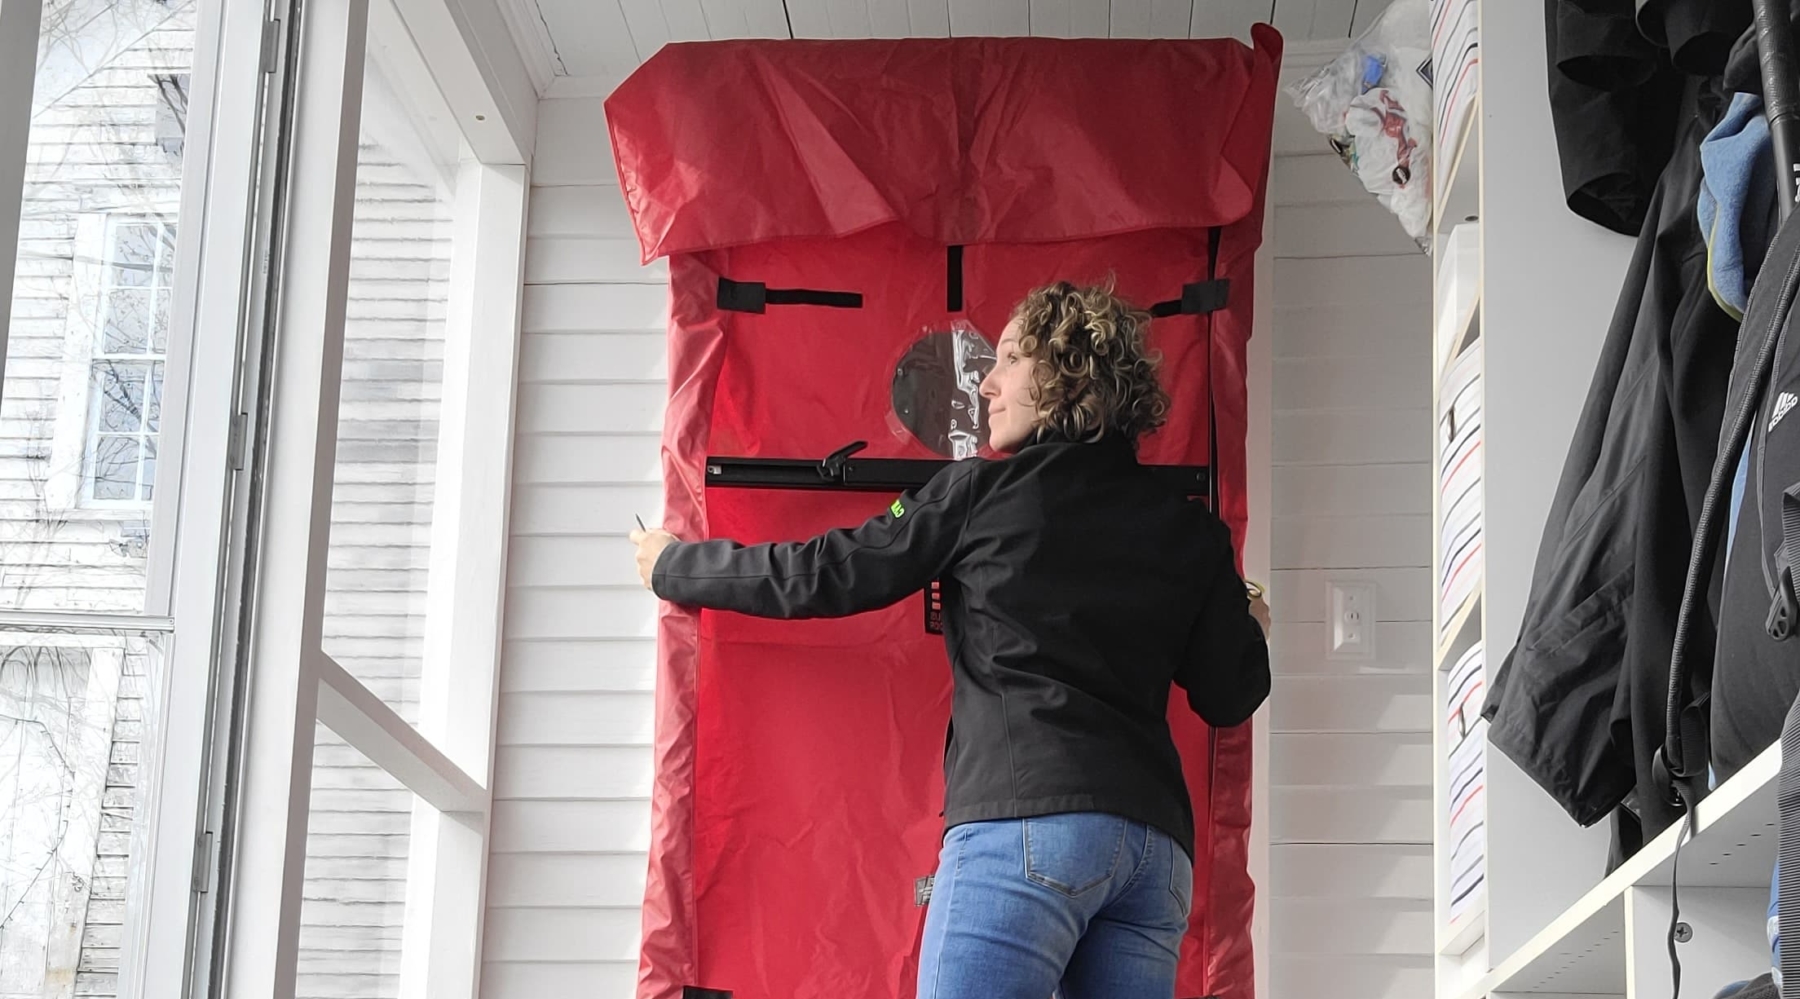
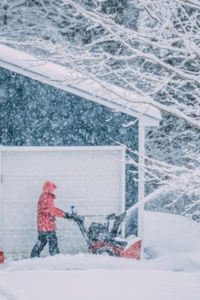
If you live in New Hampshire, you are no stranger to crazy winter weather. According to NOAA’s National Centers for Environmental Information, the coldest temperature on record in New Hampshire (-50°F) was on January 22, 1885. That was at the summit of Mount Washington. Likewise, many winters in New Hampshire bring snow, rain, ice, and chilly temps.

A well-insulated home is crucial, especially the week of January 16-23, 2023. The Almanac raises a red flag for bouts of heavy rain and snow across the eastern two-thirds of the country. Additionally, this will be followed by what might be one of the coldest outbreaks of arctic air they have seen in several years. How cold? Try 40 degrees below zero!

Use Eco-Friendly Building Insulation

Many homeowners don’t realize how effective insulation can be at making their homes more comfortable and efficient. Insulation in key areas like the attic, basement, and exterior walls slows heat transfer in and out of the home. This means that in the winter, your expensive and valuable heat stays inside your home, right where you want it. Cellulose and spray foam insulations are especially effective insulation materials.

With the right insulation upgrades, you can expect benefits like:

  • Fewer drafts and cold spots
  • Warmer floors
  • Lower annual heating/cooling costs
  • Enhanced overall comfort
  • Greater home energy efficiency
  • Reduced outside noise

When insulation is paired with proper air sealing to eliminate air leaks, the benefits go even further! So don’t keep throwing your money out the window. The Green Cocoon has eco-friendly building insulation that comes in various forms. We have what you need!

Contact us to learn more!

Hurricane Photo by NASA on Unsplash

Hurricane Season Means It’s Time to Check the Roof!

Home Maintenance Tips

Every year as storm season rolls around, millions fear for the safety of their family as well as the safety of their home. Hurricane season in New England is defined as June 1 to November 30. However, 75 percent of the 40 tropical systems that have impacted our region in the past century have struck during the months of August and September.

Add Strength to Your Home

Spray foam is used as a high-performance adhesive. If you mix the A and B sides of spray foam together, the curing liquid sticks to everything. This creates a strong bond with most any type of surface. In a foam form, the curing polyurethane adhesive rises to fill small gaps between irregular surfaces. This is closed cell spray foam. It reduces excess waste and energy consumption in buildings by up to 50% while adding strength—R-value (7 per inch).

Used in Construction Industry

foam insulation in attic
Polyurethane adhesives are used to bond gypsum board to framing, especially in manufactured housing applications. Two inches of closed cell spray foam between wall stud framing can provide nearly the same racking strength as a half inch of oriented strand board (OSB) sheathing, according to sprayfoam.com. The same application of closed cell foam below the roof deck, between the rafters and trusses (new construction or retrofit), can increase the wind uplift resistance by a factor of three. It can also provide a secondary water barrier if the roof shingles fail.

You worked hard to put the roof over your family’s head. Don’t let a storm carry it away! Contact us and ask how you can get closed cell spray foam in your home today!

Candace from The Green Cocoon Performs a Blower Door Test

Why You Need Blower Door Testing

Home Maintenance Tips
Blower door testing helps us understand where structures leak and is the first step toward building tighter, more energy-efficient homes.

What is a blower door test?

The purpose of Blower Door Testing is to measure the air tightness of a home and check for air leakage. A blower door is a powerful fan that mounts into the frame of an exterior door. The fan pulls air out of the house, lowering the air pressure inside. The higher outside air pressure then flows in through all unsealed cracks and openings.

Blower Door Testing Diagnostic Tool - The Green Cocoon Insulation
Image courtesy of energy.gov/.
These are some reasons for establishing the proper building tightness:
  • Reducing energy consumption from excess air leakage
  • Avoiding moisture condensation problems
  • Avoiding uncomfortable drafts caused by cold or warm air leaking in from outside
  • Controlling outdoor contaminants, pests, and odors from entering your home.
  • Determining proper sizing and airflow requirements of heating and cooling equipment.
  • Determining whether mechanical ventilation is needed to provide acceptable fresh air and maintain indoor air quality in your home.

Determine the air infiltration rate

green-cocoon-thermal-imaging-1 
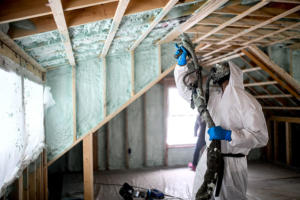
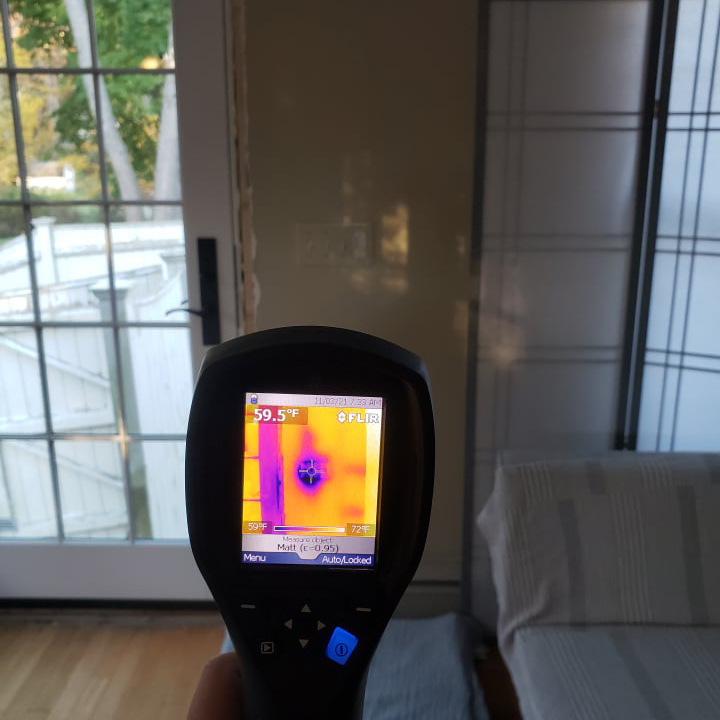
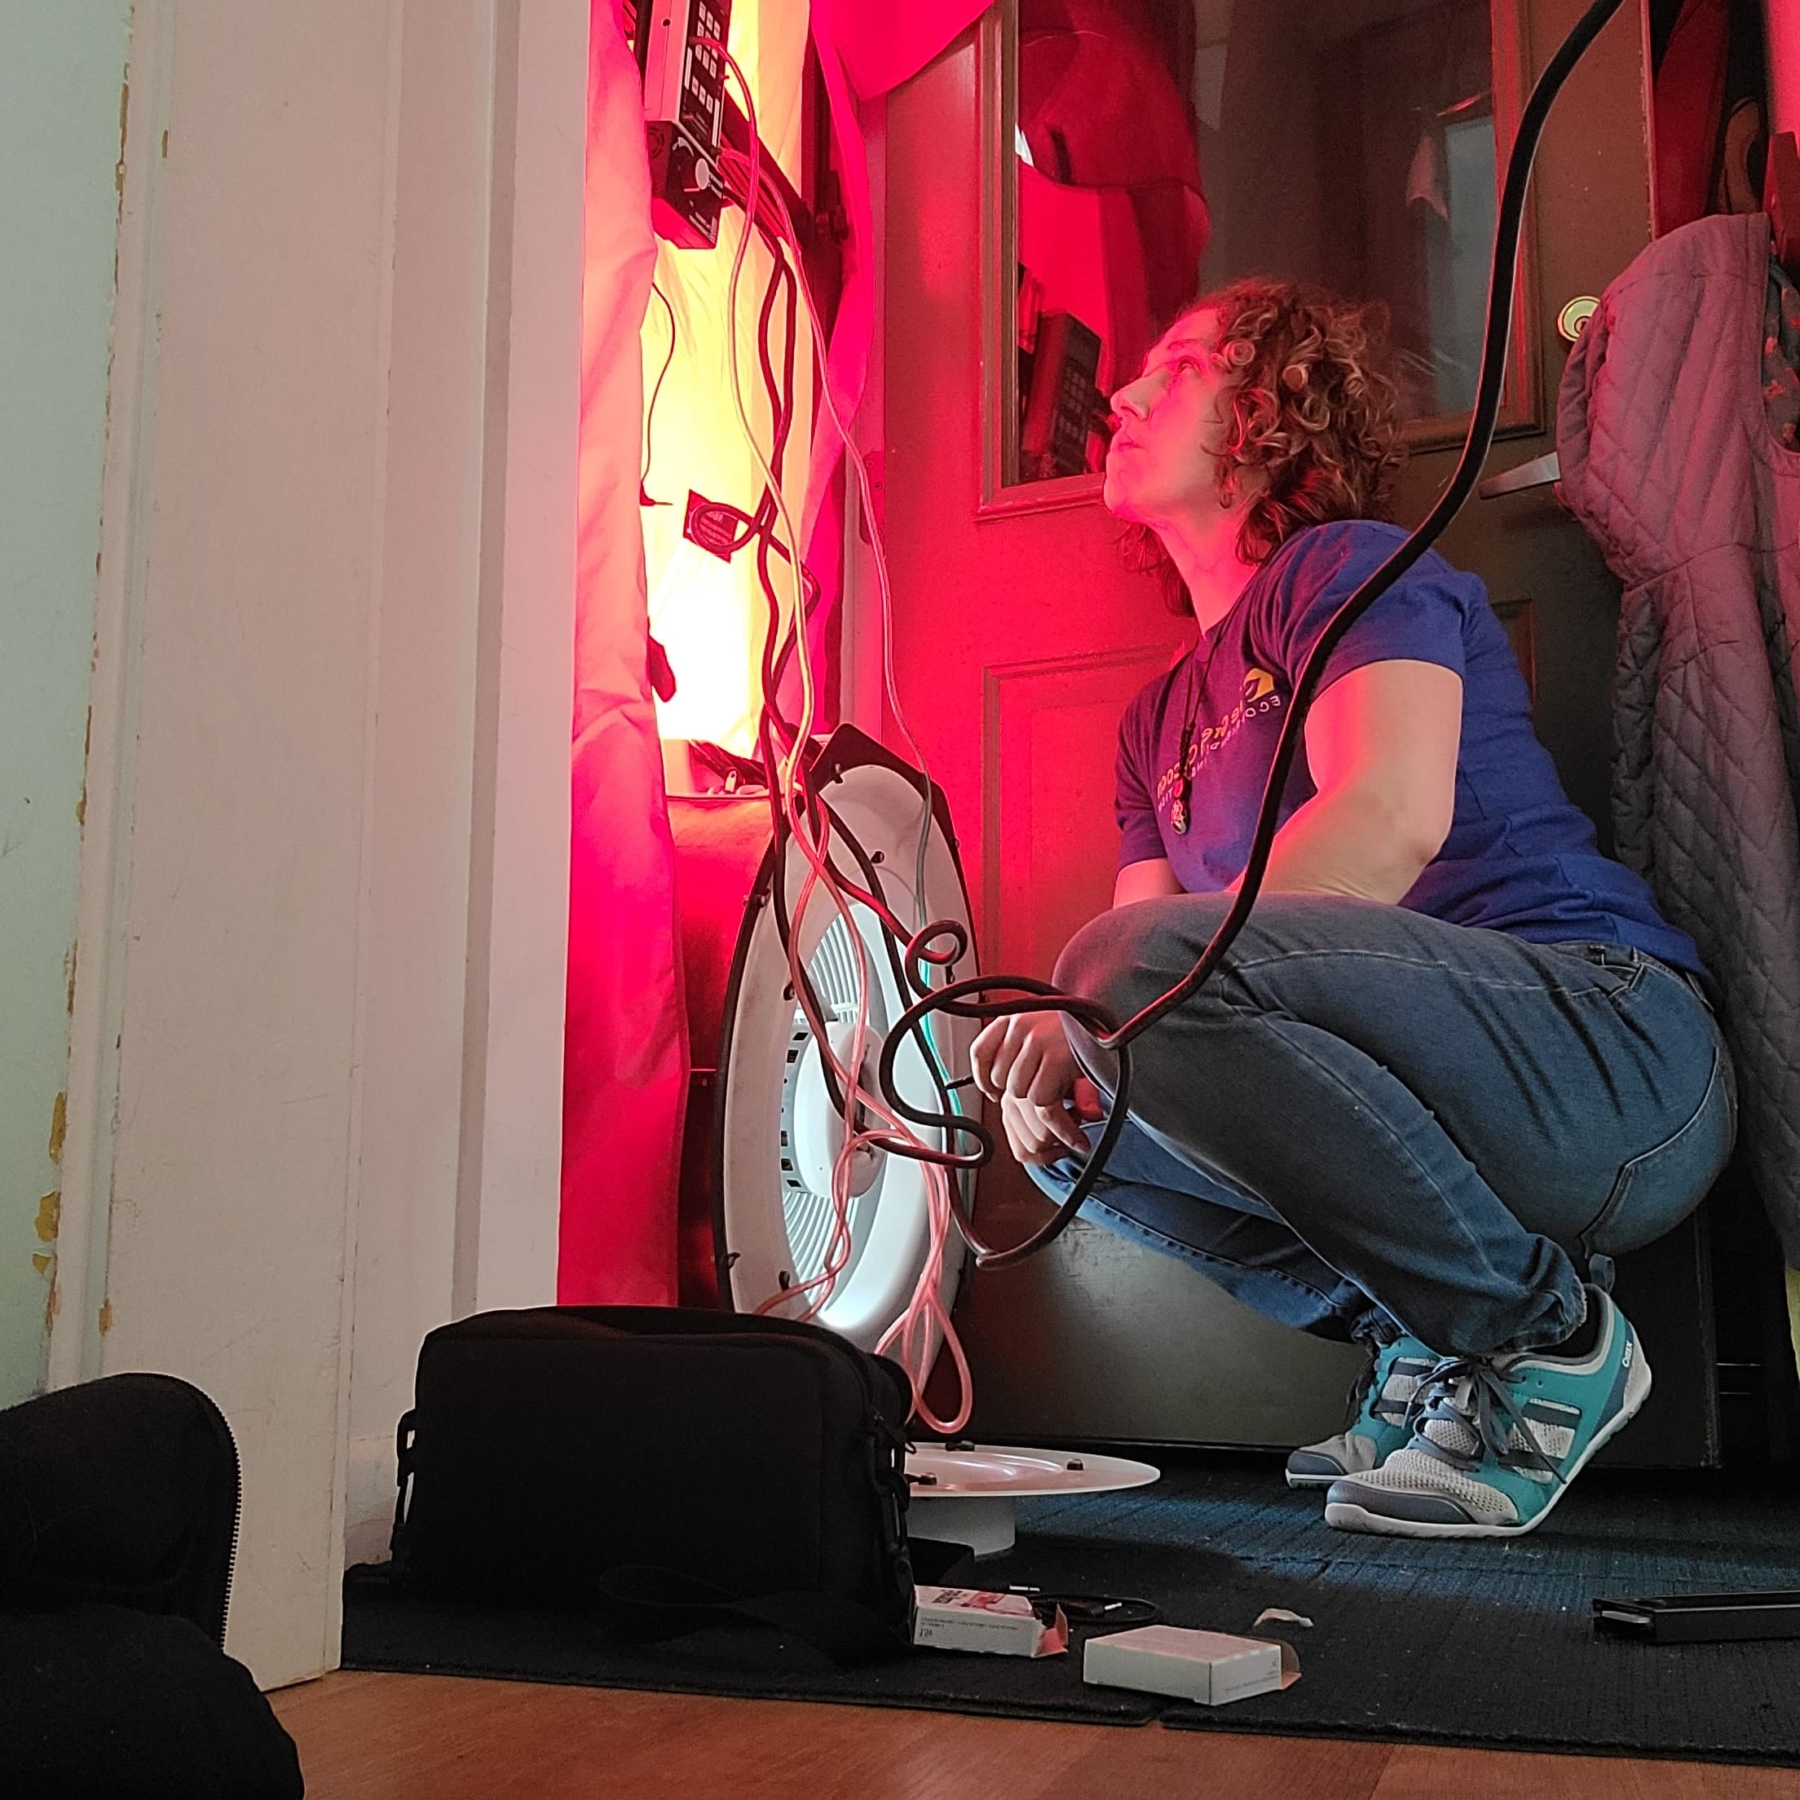
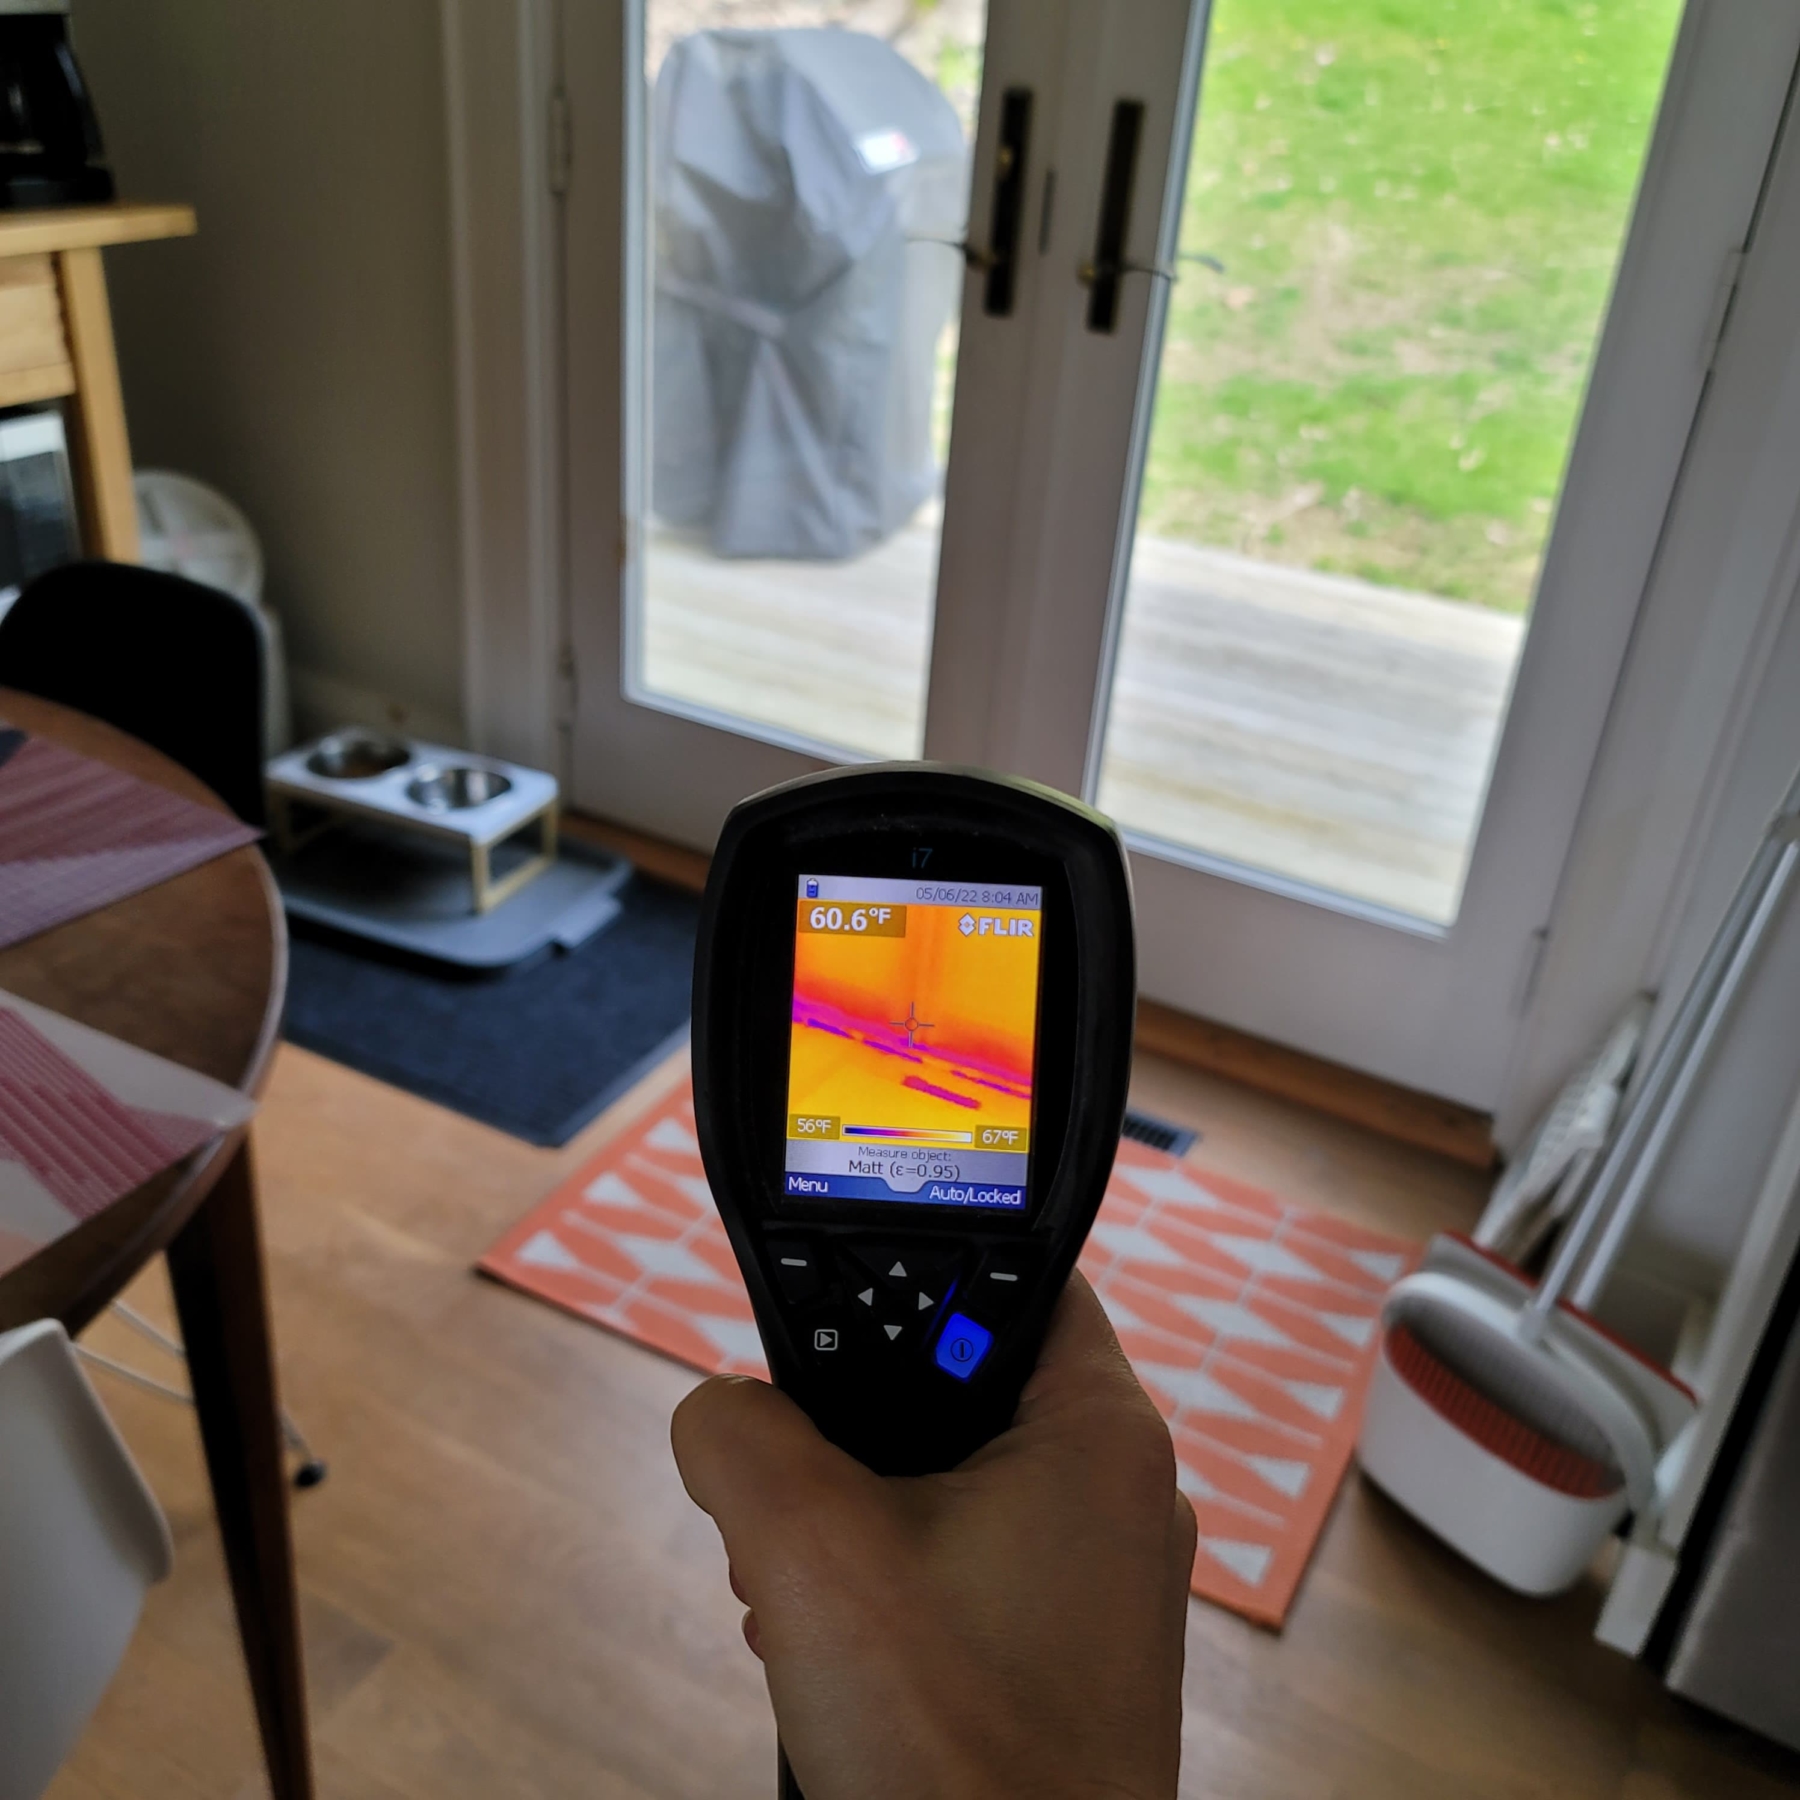
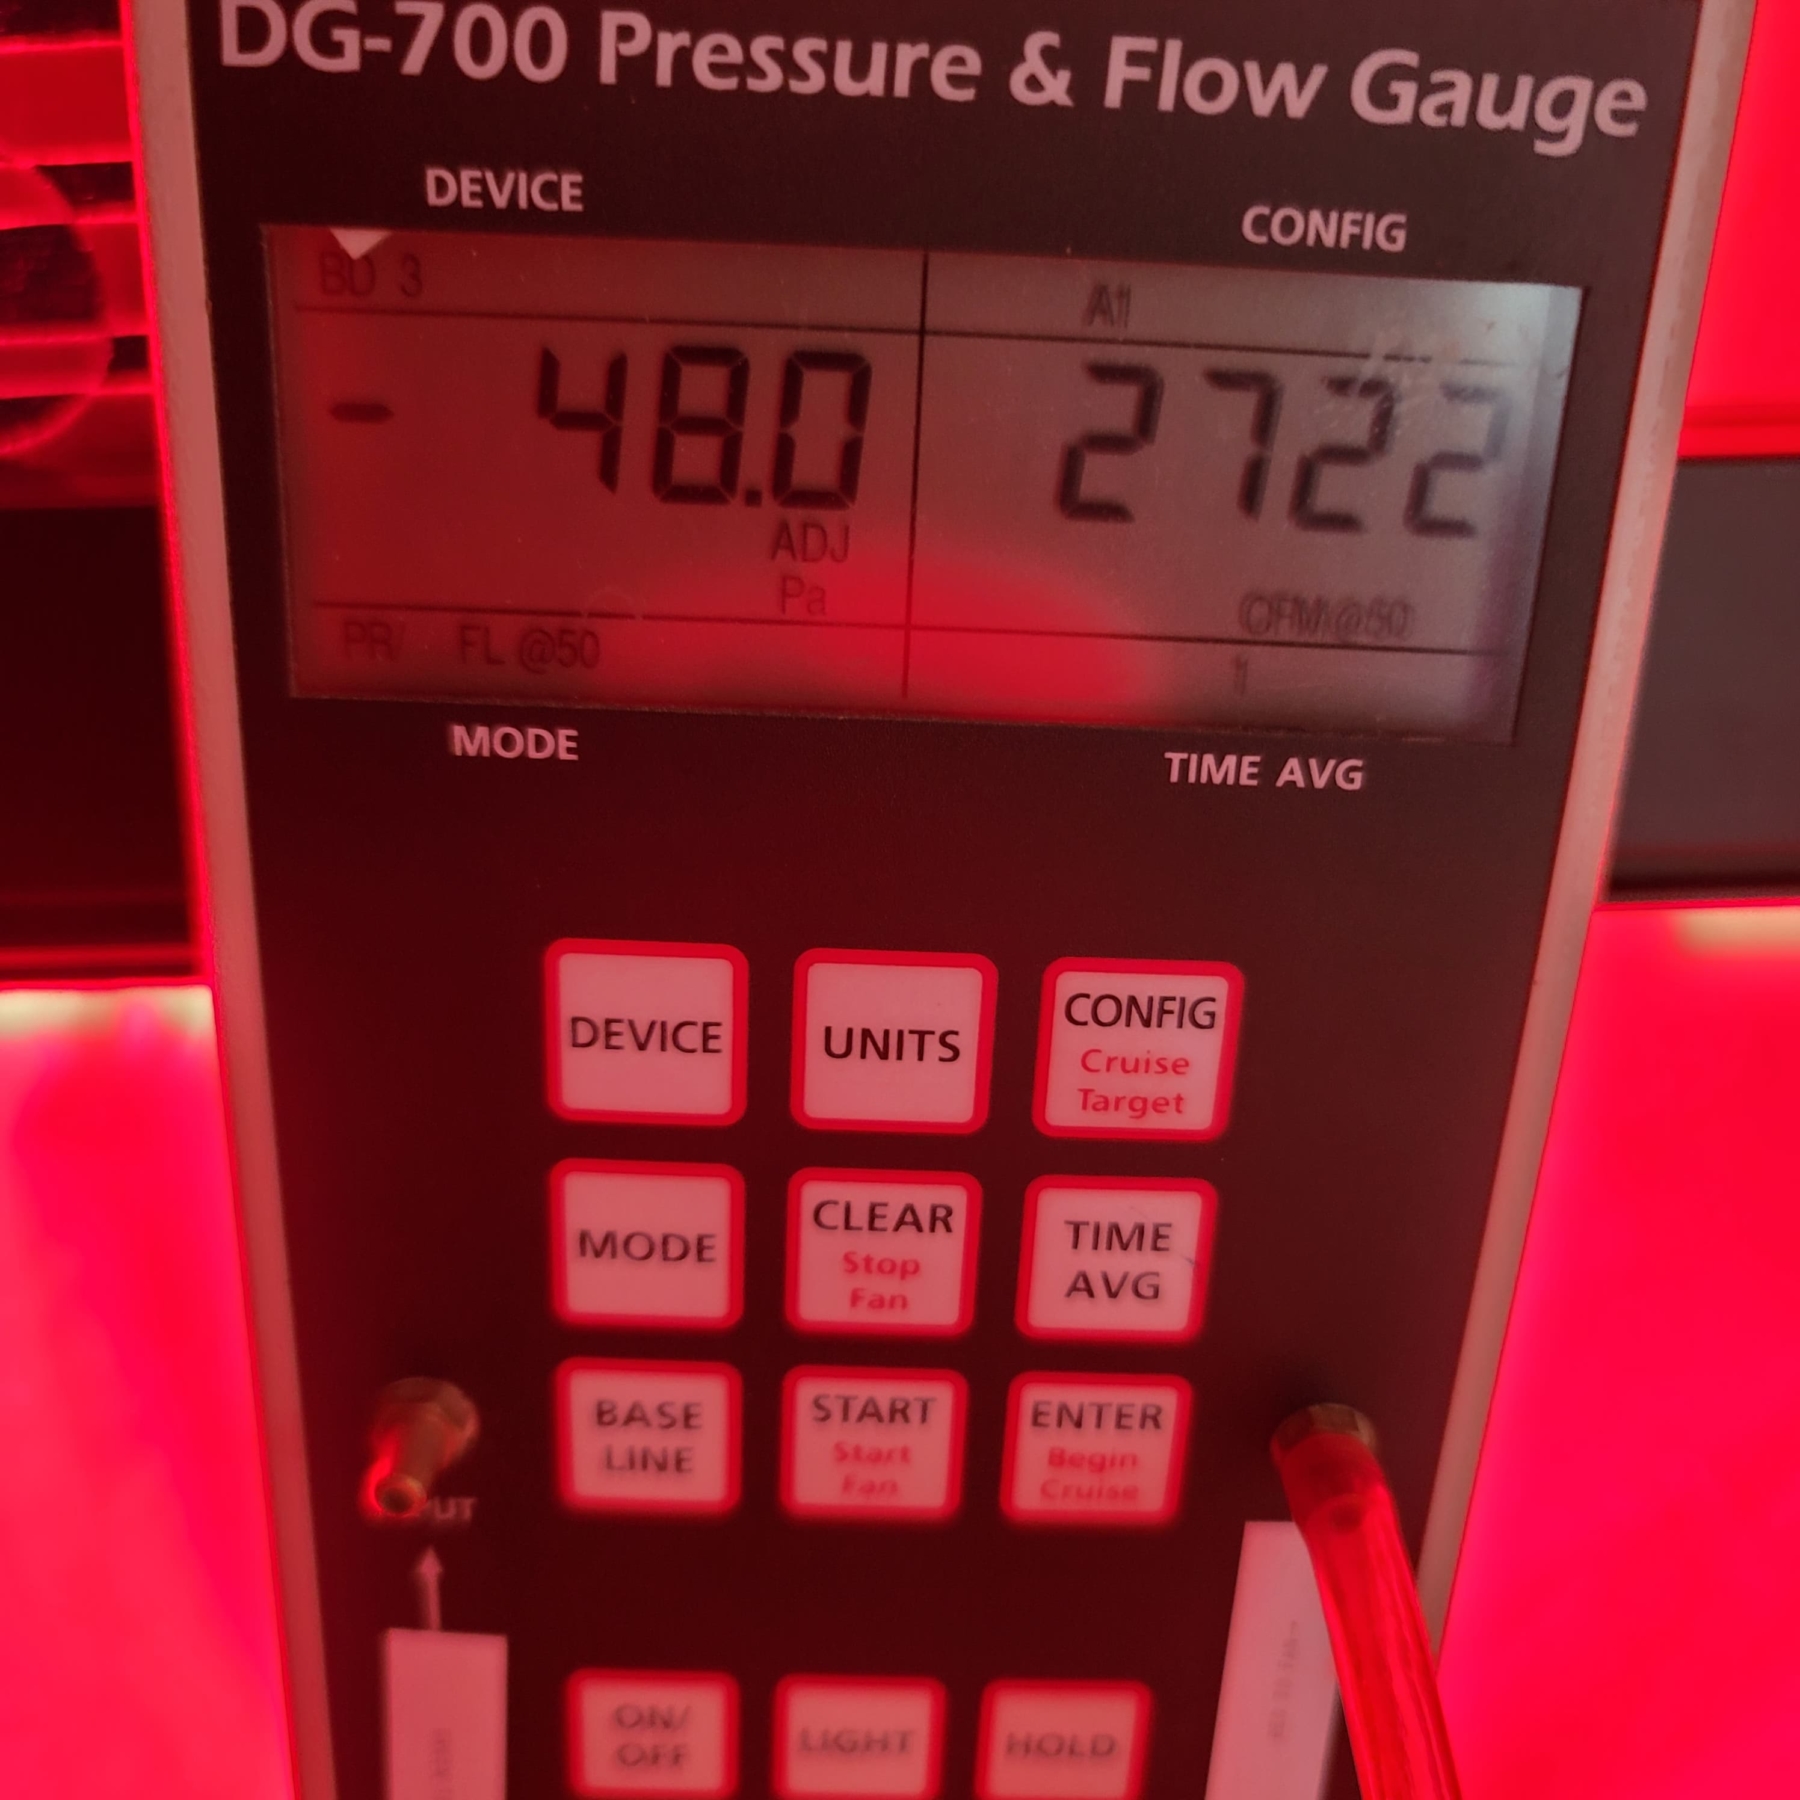
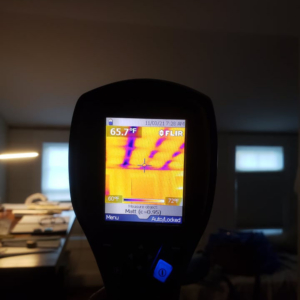
While the blower test is being conducted, our insulation specialist may use an infrared camera to look at the walls, ceilings, and floors. Moreover, this test finds specific locations where insulation is missing and air is leaking.

Preparing for a blower door test

Our experienced insulation specialist performs the blower door test. This includes a walk-through of your home, setting up the blower door, and conducting the test. The following steps will help prepare your home for a blower door test:
  • Plan to do a walk-through of your home with the specialist. Be prepared to point out areas that you know are drafty or difficult to condition comfortably.
  • Expect the specialist to request access to all areas of your home including closets, built-in cabinets, attics, crawl spaces, and any unused rooms.
  • The specialist will need to close all exterior doors and windows, open all interior doors, and close any fireplace dampers, doors, and woodstove air inlets.
  • If you heat with wood, be sure all fires are completely out – not even coals – before the specialist arrives. Remove any ashes from open fireplaces.
  • Expect the specialist to set controls on all atmospheric fossil fuel appliances (e.g., furnace, water heater, fireplaces, and stoves) to ensure that they do not fire during the test. The specialist should return them to the original position after the test.
  • Expect the test to take up to an hour or more, depending on the complexity of your home.

The Green Cocoon offers custom, cost-effective solutions to make your home or office building more comfortable. Additionally, this saves you money on your energy bills. Our troubleshooting and diagnostic skills separate us from the pack! For more information, contact us

Blower Door Testing
green-cocoon-thermal-imaging-1

Thermal Imaging Cameras: Where and Why We Use Them

Home Maintenance Tips

The Green Cocoon has many tools in its arsenal to help you stay warm and save you money. One of those tools is a thermal imaging camera. Where and why do we use it? We use it when we come to your home to evaluate your space. We use the camera to show you where cold air is coming in. Also, the camera comes in handy when we need to discover if there is insulation inside a wall or ceiling. We don’t have to guess. The camera tells us!

What is a thermal imaging camera?

Thermal imaging cameras are devices that translate thermal energy (heat) into visible light. This is done  in order to analyze a particular object or scene. Furthermore, the image it produces is known as a thermogram. The analysis of a thermogram is done through a process called thermography. Thermal imaging cameras are sophisticated devices that process the captured image and display it on a screen. The image can be used for immediate diagnosis. Or, they can be processed through specialized software for further evaluation, accuracy, and report output. Consequently, thermal imaging cameras take measuring temperature to the next level. Instead of getting a number for the temperature, you get a picture showing differences in temperature.[i]
green-cocoon-thermal-imaging-1
Here you can see thermal bridging through ceiling joists and how a lack of air sealing can really spread the cold air
green-cocoon-thermal-imaging-2
Here we see a completely uninsulated wall bay
green-cocoon-thermal-imaging-3
This photo illustrates how much cold comes through an outlet switch cover that isn’t properly air sealed and insulated

Thermal imaging camera applications and uses

The first commercial thermal imaging camera sold in 1965 for high voltage power line inspections.[ii] Since then, thermal imaging cameras have been used in many fields. Firefighters use them to see through smoke, find people, and localize hotspots of fires. Additionally, physiological activities can also be monitored with thermographic imaging. Fever in human beings and other warm-blooded animals is just one of many. Building construction technicians can see heat leaks to improve the efficiencies of cooling or heating.  Additionally, thermal imaging cameras are a common tool used by home inspectors.

Camera used in our evaluation

When our salesperson comes to evaluate the space you would like to insulate, they will be using a Thermal Imaging Camera. Having a tool that instantly shows a client where and how much insulation is needed, is invaluable. Contact us to schedule an appointment.
[i] Grainger. Thermal Imaging Cameras Explained. Retrieved from grainger.com. [ii] Wikipedia. Thermographic Camera. Retrieved from Wikipedia.org.
The Green Cocoon - Thermal Bridging Photo

Understanding and Managing Thermal Bridging

Home Maintenance Tips

When you are ready to insulate your living space, you may be contemplating what R-value you will need. And why not? It is the most widely accepted measure of insulation and often aligns with a minimum code requirement. But assuming that your wall assembly will realize the R-value of your insulation ignores a crucial variable in building science—thermal bridging. Understanding and managing thermal bridging will make your living space more comfortable. And, it will save you money!

What is thermal bridging?

Thermal bridging is when a particularly conductive (or poorly insulating) material allows heat flow across a thermal barrier. Physics dictates that hot wants to go to cold and a thermal bridge is a perfect invitation. The best analogy is to think studs within an insulated wall. The insulation on either side of a stud will do its job of limiting heat flow. But, the wooden stud, which has a much lower R-value, will not. These bridges can become expressways of heat loss.

green-cocoon-insulation-ma-open-cell
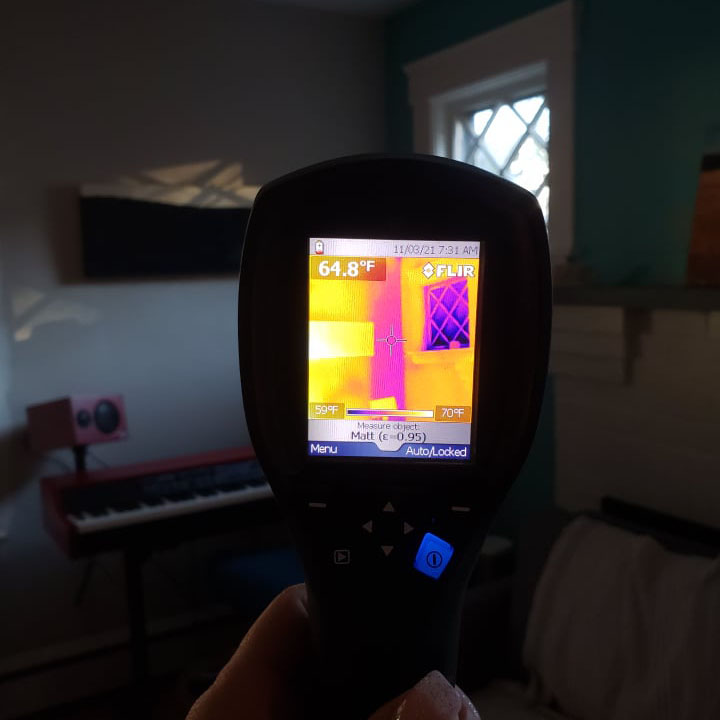
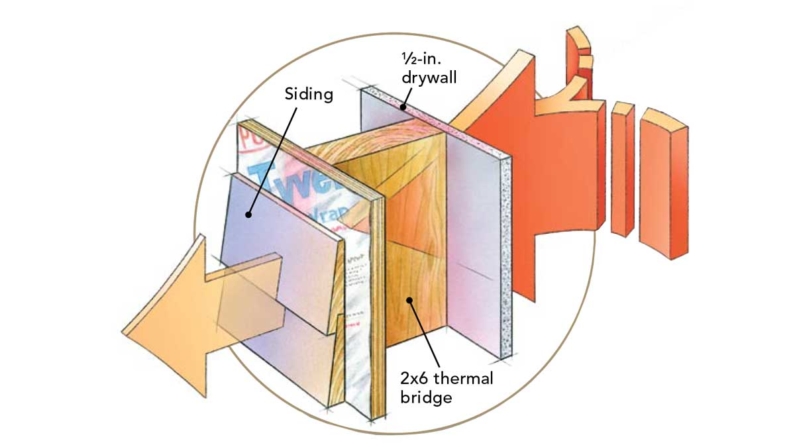
How does this work in a home?

To understand and manage thermal bridging, let’s continue with the stud example. The typical R-value of a 2×4 wooden stud is 4.4, while the insulation on either side is much higher—typically greater than R13. The result of this bridge is heat being transferred and a significant loss in the wall’s effective R-value. In a wood stud wall with R20 insulation, thermal bridging can reduce the effective R-value to as low as R15. One of the worst thermal bridges is a metal stud. This can reduce effective R-value by as much as 80 percent. Along with studs, other typical building materials that create thermal bridges are metal fasteners, plates, headers, and windows. Typically, you can observe these all around a house—roofs, walls, fenestrations, for example.

The impacts of thermal bridging

If you are losing heat through thermal bridges, the efficacy of your climate control system decreases and uses more energy. Furthermore, these bridges can create cold spots within your walls where condensation can easily form. This moisture can produce a whole host of issues to the wall cavity—mold and mildew or rot, to name a few. Excessive moisture also challenges the structural integrity of your wall.

How do we prevent or limit thermal bridging?

Luckily advancements in building science and common sense can really help limit thermal bridging. Realistically, most homes will have some thermal bridging happening, but there are tools at our disposal to help prevent it.

  1. Exterior insulation – According to Havelockwool.com, a better term would be “out-sulation.” This means that by wrapping the exterior of your home in insulation you can prevent (or dramatically reduce) the common thermal bridging via wall studs. Cork is a great option. You can spray foam the exterior, add rigid board or Rockwool as well.
  2. Advanced house framing or Optimum Value Engineering – The goal of this building technique  is to reduce lumber used in framing, which reduces thermal bridging. There are a lot of strategies incorporated, including spacing wall studs up to 24 inches on center, eliminating headers in non- load-bearing walls, designing on two-foot modules to make the best use of common sheet sizes, and to reduce waste.
  3. Insulated studs – The company T Stud produces an R19 stud that is a thermally broken, insulated wall stud assembly. They also have the BareNaked Tstud™, which is an uninsulated, thermally broken wall stud that you can insulate with the insulation of your choice. These studs can not only reduce thermal bridging, but they are incredibly strong.
  4. “Alternative” Wall Assemblies – Structural Insulated Panels (SIPs) are a common alternative to stick-built construction and can help limit thermal bridging. These panels have an insulated foam core between two rigid board sheathing materials, which when installed properly, can provide a continuous air and vapor barrier. There are issues, however, including the use of foam. Bamcore makes a bamboo wall system that is an environmentally friendly, extremely high-performance option.

Understanding and managing thermal bridging is easy

In conclusion, understanding and managing thermal bridging is a must because thermal bridging happens in every home. And, if you are constructing a new building, you can take care of that very easily. If you have older construction or renovation, you can use the best insulation possible in between the base to mitigate the amount of thermal bridging happening.

Contact us, and we’d be happy to answer all of your questions.

This article is based on an article from Havelockwool.com.

The Green Cocoon - Insulation against cobwebs

Got Cobwebs? Air Is Coming In!

Home Maintenance Tips

Did you know that spiders make cobwebs in the draftiest areas of your home? That is because it gives them the best chance of catching a flying insect. Got cobwebs? That means air is coming in the house. Moreover, you can use the cobwebs to find where the drafts are!

Tons of Cobwebs

During a recent visit to a potential customer, The Green Cocoon team was shocked to see how many  cobwebs there were (see photos below). We have never seen that many cobwebs in a basement, and the basement isn’t even that old!

Time to Insulate!

“Combined with improvements to insulation and the heating/cooling system, air sealing improves your comfort, increases indoor air quality, and reduces greenhouse gas emissions by reducing your energy use. It’s called “home performance.” (The Climate Center)

In conclusion, if you have cobwebs in your basement or anywhere in your home, contact us and we will help you eliminate the incoming air problem.

The Green Cocoon - Insulation against cobwebs

1 2 Next »
Recent Posts
  • Insulate the Attic Floor or Roof Deck with Spray Foam?
  • What Is R-Value and Is It Really That Important for Insulation?
  • Top 5 Myths About Insulation Debunked
  • How Spray Foam Insulation Keeps Your Home Cool in the Summer 
  • Can You Use Spray Foam Around Water Pipes? 
Categories
  • Attic Insulation
  • Basement Insulation
  • Blog
  • Cellulose
  • Closed Cell
  • Energy Efficiency Tips
  • Fiberglass
  • Financing
  • Giving Back
  • Home Maintenance Tips
  • Insulation Tips
  • News
  • News and Awards
  • Open Cell
  • Passive
  • Projects
  • Renovation Tips
  • Rockwool (Mineral Wool)
  • Save Money
  • Spray Foam
  • Sustainability Tips
  • Vapor Barriers

The Green Cocoon, LLC (TGC) delivers energy-efficient, eco-friendly insulation solutions to residences and businesses throughout Massachusetts, New Hampshire, and Southern Maine.

Quick Links

  • Financing
  • FAQs
  • Careers
  • About
  • Contact

Our Products

  • Open Cell Spray Foam Insulation
  • Closed Cell Spray Foam
  • Cellulose Insulation
  • Mineral Wool Insulation
  • Fiberglass Insulation

Contact

  • The Green Cocoon, LLC 107 Elm Street, Rear Salisbury, MA 01952

  • info@thegreencocoon.com

  • 978-462-0082

Sign up for our Newsletter!

© Copyright 2024 The Green Cocoon All Rights Reserved

Design & Developed by : 8 Waves Creative